Staining a door without removing it is a great way to save time and effort while still achieving the same look. It’s also much less invasive than removing the door from its hinges, which can involve more carpentry work or hiring a professional. When staining a door without having to remove it from its frame, you’ll need to follow a few steps: clean the surface, sand it down, apply the stain evenly, and finish with a sealant.
There are numerous advantages to staining a door without removing it, including saving time and money. The biggest advantage is saving time by avoiding the need to remove and reinstall the door. This can save you from having to pay for extra labor costs and any materials needed for installation. In this blog post, You will learn in detail how to stain a door without removing it.
Materials You Will Need
- Sandpaper
- Tack cloth
- Drop cloths/tarps
- Stain of choice
- Stain applicator (paintbrush or rag)
- Masking tape
- Mineral spirits
- Paint thinner
- Plastic gloves
- Safety glasses
- Staining sponge
- Dust mask
Before beginning this project, ensure all the necessary materials are on hand so you can work without interruption.
Step-by-Step Processes for How to Stain a Door Without Removing It
Step 1: Inspect Your Door Thoroughly
Carefully inspect the door to be stained, and ensure that it is smooth and free from any dents or damage Before starting, examine your door thoroughly for any cracks or defects that may affect the staining process. If you find any problems, repair them before proceeding.
Step 2: Sand the Door Down
Lightly sand down the entire door with fine-grit sandpaper to provide a tooth for the stain to adhere to and create an even finish. Use an ammonia-based cleaner to remove any dust or dirt from the door’s surface. Allow to dry completely before moving on to staining.

Step 3: Tape Off Edges and Hinges
Before staining, be sure to cover any metal hinges, locks, or other hardware with painter’s tape to protect them from staining. Apply a pre-stain wood conditioner to the door surface with a soft cloth. This will help provide even absorption of the stain and reduce any streaking. Allow the conditioner to dry completely before moving on to staining.
Step 4: Apply Stain to Door
Apply a wood stain of your choice toward the grain with a soft brush or rag. Start at the top and work down, overlapping each stroke slightly so there are no gaps. Allow the stain to penetrate for about 10 minutes before wiping off any excess.
Step 5: Wipe Off Excess Stain
After 10 minutes, use a clean cloth to wipe off any excess stains. Work with the grain of the wood to ensure an even finish. Allow the door to dry completely before moving on. Once the stain is dry, apply a polyurethane finish with a brush. This will protect the door and give it a glossy, professional-looking finish. Allow to dry completely before moving on.
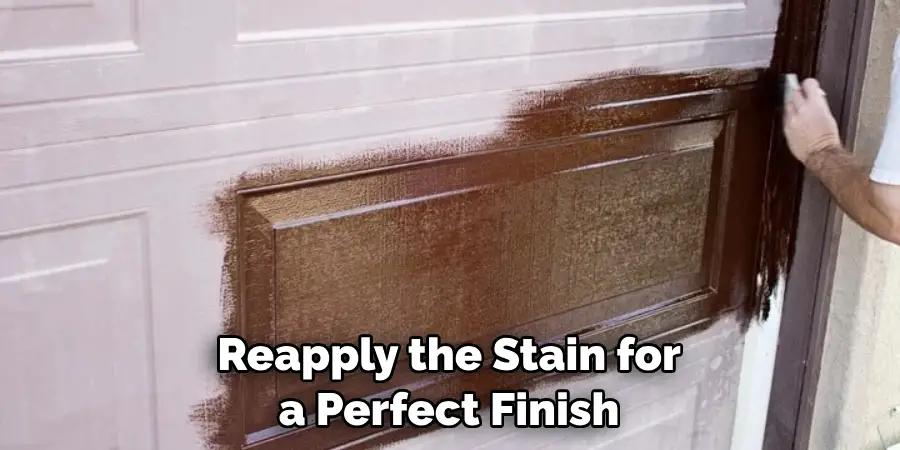
Step 6: Inspect the Door for Smudges or Streaks
Once the door is dry, inspect it for any smudges or streaks caused by the staining process. If you find any, lightly sand them away and reapply the stain for a perfect finish. Once the door is completely dry, reattach all of its hardware and trim pieces with screws before hanging it back into place.
Following these steps, you can stain a door without removing it first. You will be left with a beautiful, professional-looking finish that will transform any space into something special.
Safety Precautions for How to Stain a Door Without Removing It
- Wear protective clothing like a mask, goggles, and gloves when staining the door to avoid contact with dangerous chemicals in the stain.
- Ensure you work in a well-ventilated area away from open flames or combustible materials.
- Place a drop cloth or plastic sheeting around the door to protect the surrounding area from any spills or splatters.
- Test a small, inconspicuous area of the door with a sample of the stain before you begin staining the entire door.
- Work in sections and use long strokes when applying the stain to avoid drips and streaks.
- Allow the stain to dry completely before applying a second coat of stain.
- Before disposing of any rags, brushes, or other items used for staining, ensure they are not combustible and that all excess stain has been removed.
Following these safety precautions is essential for anyone who wants to stain a door without removing it. With the right safety measures in place, you can enjoy a beautiful stained door in no time.
Do You Need to Sand Your Door Before Staining It?
Before you begin staining your door without removing it, you must determine if the door needs to be sanded before staining. If the door’s surface is rough or uneven, sanding will help to even out the surface prior to staining.
You will need medium grit (150-220) sandpaper and a sanding block to do so. Sand in the same direction as the wood grain, using light strokes to evenly remove any imperfections and smooth out the door’s surface. When finished, wipe off any dust or debris with a damp cloth before staining.
Once you have determined that your door requires no sanding, it is time to begin staining it without removing it. You will need a stain of your desired color, a paintbrush or foam brush, and a lint-free cloth to do so.
Begin by applying the stain with a brush or foam brush in even strokes, following the direction of the wood grain. Once you have applied an even coat of stain, allow it to dry according to the manufacturer’s instructions before wiping off any excess with a lint-free cloth. Allow your door enough time to dry fully before adding another coat of stain until you reach the desired color or coverage.
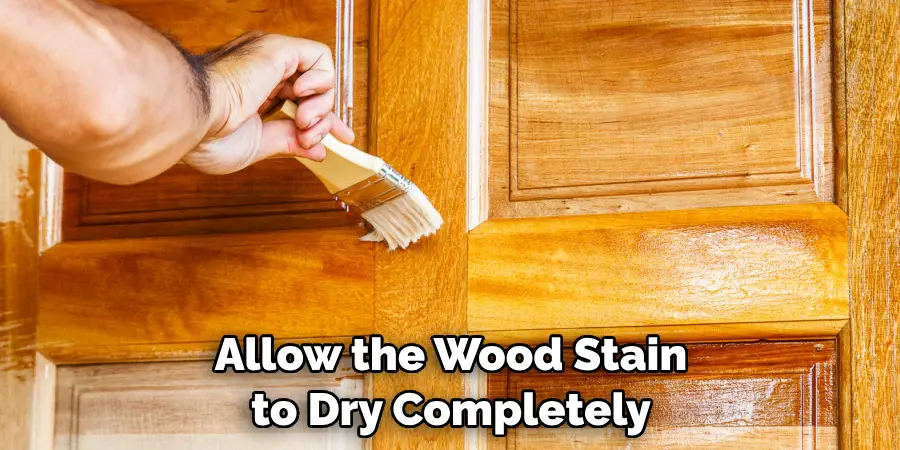
How Long Should You Allow the Wood Stain to Dry Before You Apply a Sealant?
When staining a door without removing it, it is important to allow the wood stain to dry completely before applying a sealant. Depending on the type and brand of stain used, this can take anywhere from 4-24 hours. After the wood stain has been applied, you should apply a light coat of sealant to protect and extend the life of the stain.
When applying a sealant, you should ensure your door is completely dry by either wiping it down with a clean cloth or checking for moisture with a damp rag. If any moisture is present on the door, it is best to wait until it fully dries before moving forward with sealing the wood.
Once the door and wood stain are both completely dry, you can apply a sealant of your choice. On the type of sealant you choose, it will be necessary to wait anywhere from 24-48 hours before using any weight on the door. To ensure that your staining project is completed correctly and without any issues, it is important to allow the wood stain to dry completely before applying a sealant.
Is Remove Any Mistakes or Uneven Staining Possible After the Process is Complete?
Yes, removing any mistakes or uneven staining is possible after the process is complete. It is important, however, that you take extra caution when staining a door without removing it as there may not be enough room to work in.
If mistakes are noticed after the stain has dried, you can use steel wool and mineral spirits to even out the surface. This process may take multiple tries, but you can get a perfect finish every time with patience and practice.
If you find that your door has been overstaining, sanding it down lightly should do the trick. Make sure to use fine-grit sandpaper to minimize any damage to the door.
Once you have achieved the desired finish, be sure to seal it with a protective layer to protect your newly stained door from fading over time. Overall, staining a door without removing it can be done if you follow the proper steps and take care when applying the stain. By taking your time and being patient, you can achieve a beautiful finish that will last many years.
How Often Should You Re-stain Your Door to Keep It Looking New?
Once you’ve successfully stained your door without removing it, there is still the question of how often you should re-stain. This depends on the type of wood and the environment in which it is located. If your door is exposed to direct sunlight or high humidity, then it may need to be refinished sooner than a door kept in a more moderate environment.
If you use an oil-based finish, then two to three years is a good rule of thumb for reapplying the stain. If you use a water- or acrylic-based finish, then you should re-stain every five to seven years. It’s also important to remember that if your door is exposed to a lot of moisture, such as in a bathroom, then it may need to be re-stained more frequently. Regular maintenance can also help keep your door looking its best for longer. This includes using a soft cloth and warm, soapy water to clean the wood regularly.

Conclusion
In conclusion, staining a door without removing it is possible with the right tools and techniques. Though it may require time and patience, the results will be worth it in the long run, as you’ll have a beautiful new look for your door that will last for many years to come.
Be sure to follow all safety procedures when working with any type of staining supplies to prevent any accidents or injury. With the right tools and techniques, anyone can stain a door without removing it and create stunning results. I hope reading this post has helped you learn how to stain a door without removing it. Make sure the safety precautions are carried out in the order listed.