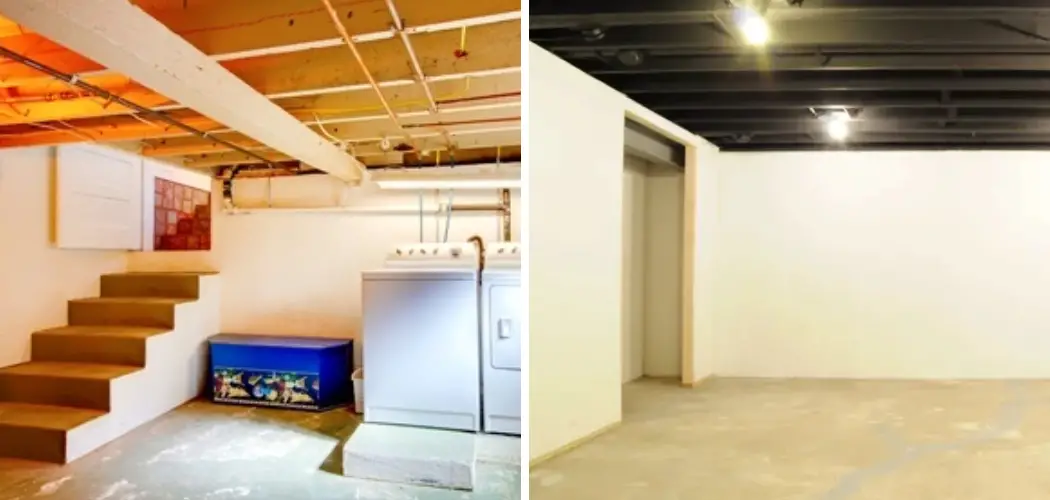
Painting your basement ceiling adds a finished touch to any space and makes it look more put-together. But if your basement has exposed joists, the task of painting becomes somewhat more complicated. It is important to know how to paint a basement ceiling with exposed joists.

Don’t fret – with the right supplies and knowledge, painting a basement ceiling with exposed joists can be an easy job that you can do yourself! In this blog post, we’ll cover the essential steps needed for a successful project over the weekend—so let’s get started!
Tools You Will Need
- Drop cloths
- Primer
- Paint roller and extension pole
- Painter’s tape
- Paintbrush or paint sprayer
- Caulk gun and caulk
- Ladder
- Sandpaper or sanding block
Preparation
Before you tackle your painting project, it’s important to take extra care in preparing your space for the job. Start by laying down drop cloths or plastic sheeting over any surfaces you want to protect.
Next, you’ll want to fill any holes or gaps in the exposed joists with a caulk using a caulking gun. This helps form a solid base and will give the paint something to grip. Finally, you’ll want to sand down any rough spots or splinters in the exposed joists evenly and wipe away the dust.
5 Steps on How to Paint a Basement Ceiling With Exposed Joists
1. Apply Primer:
If you’re looking to give your basement a professional-looking finish without spending too much time or money, applying primer to the exposed joists of your basement ceiling is a great solution. Priming them will keep any moisture at bay and also make sure that your paint adheres better than it would without the primer.

Preparing for the job requires more effort than the actual painting since you’ll need to move furniture out of the way and cover vents and wiring to prevent any mess from getting in them. To get started, use a roller to apply primer directly on each joist.
A Tip: Make sure you paint in a zigzag pattern so each joist gets an even coat of primer.
Once this step is finished, allow them to dry before grabbing your brush and adding a few finishing touches with additional coats if necessary. With these simple steps and only minimal supplies, you’ll be able to take pride in having successfully given your basement ceiling an impressive refresh!
2. Mask the Joists:
Painting a basement ceiling with exposed joists can be a daunting task for any homeowner. Before you begin covering them up, make sure all the wiring is in good condition and won’t be compromised. Once that is checked off the list, it’s time to begin masking off the joists.
Tape and fabric will provide sufficient coverage while painting and ensure extra protection against messes. Take your time going around each of the beams, making sure everything is secure to avoid drips and smudges. With due diligence, masking off the joists correctly should produce professional-grade results every time!
3. Paint the Ceiling:
Painting your basement ceiling with exposed joists is a great way to add a unique design element to any living space. Your job will be easier if the joists and other surfaces in the ceiling aren’t too dusty.
Give them a good clean before you start working! Before painting, coat the joists and other surfaces with a quality primer suitable for metal and wood – this will ensure that your paint job is long-lasting.
Thereafter, use a roller specifically designed for ceilings and an extension pole – this will speed up the process while giving you even coverage. For detailed work, you can always switch to a brush once our rolling is complete. Choose your favorite color, have fun, and get creative with it!

4. Touch-Up Areas:
Painting the basement ceiling with exposed joists is a great way to get a stylish, rustic look without a lot of hassle. To create the look, start by sanding the exposed beams, filling any holes or cracks with spackle, and wiping down the surface with a damp cloth. Then, use a primer designed for surfaces like wood before you begin painting. Start your painting in corner areas or along walls first followed by the horizontal beam lines.
Utilizing an angled brush is often best for neatly finishing around the edges of each joist; this will help ensure that drips don’t occur between them. For complete coverage along these beams, be sure to use even strokes across their flat surfaces as well as just above and below them.
Additionally, because basements are prone to more frequent condensation and humidity levels than other parts of the home, invest in high-quality paint specifically meant for basements before beginning your project. With these tips in mind, you’ll have beautifully painted basement ceiling joists that last for years!
5. Remove Painter’s Tape:
Painting the basement ceiling can be a great way to give a room a fresh look without all the mess of tearing everything out, but if you have exposed joists, it can seem like a tricky task. With the right strategy, though, you can make this project much smoother. First and foremost, you’ll want to ensure your surfaces are clean by giving them a good sweep or dusting before grabbing your painter’s tape.
Take your time taping around the edges and joints of exposed joists; this will provide a neat and clean line for your paint job. Lastly, when it comes time to remove the painter’s tape from these areas, make sure that you do so quickly and carefully — as soon as the paint is dry — to ensure a nice edge for both your paint job and for maintaining neat lines between elements in the room.
Painting a basement ceiling with exposed joists is a project that almost anyone can do. With the right supplies and knowledge, you’ll be able to complete this job quickly and easily – all while making your basement look much more put-together. So why wait? Get started on your project today!
Finished Product
Finishing Touches: Finally, once your coats of paint are dry, you can remove the painter’s tape and apply any finishing touches with a brush or roller where needed. And that’s it! Your basement ceiling with exposed joists should now be beautifully painted and look its best.
Painting a basement ceiling with exposed joists may seem like a daunting task, but with the right supplies and knowledge, it can be quite straightforward. We hope this blog post helped make your project a little easier! Good luck!
Tips to Paint a Basement Ceiling With Exposed Joists
- Choose the right paint. The first step to successfully painting a basement ceiling with exposed joists is to choose the right paint. You’ll want to use a paint that is specifically designed for ceilings, as this will help to ensure a smooth and even finish. Additionally, you’ll want to choose a paint that is mold- and mildew-resistant, as basements can be prone to these problems.
- Prepare the surface. Before you begin painting, you’ll need to prepare the surface of the ceiling. This involves cleaning the ceiling with a damp cloth to remove any dirt or debris. Once the ceiling is clean, you’ll need to repair any cracks or holes in the surface. Once the repairs are complete, you’ll need to sand the entire surface of the ceiling to create a smooth foundation for the paint.
- Prime the ceiling. After you’ve prepared the surface of the ceiling, you’ll need to apply a primer. This will help to ensure that the paint adheres properly to the surface and helps to prevent any bleed-through from occurring. When choosing a primer, be sure to select one that is compatible with your chosen paint.
- Paint the ceiling. Once the primer is dry, you’re ready to start painting! Begin by painting along the edges of the ceiling and then work your way towards the center. Be sure to use even strokes and take your time to avoid any drips or runs in the paint.
- Let the paint dry completely. After you’ve finished painting, it’s important to let the paint dry completely before moving on to the next step. This usually takes about 24 hours but may take longer depending on conditions such as humidity and temperature.
- Apply a topcoat (optional). Once the paint is dry, you may choose to apply a top coat to protect it from wear and tear. A topcoat also helps to give painted surfaces a more polished look and can make cleanup easier if there are any spills or splatters down the road.
How to Achieve a Perfect Finish When Painting a Basement Ceiling with Exposed Joists?
Painting a basement ceiling with exposed joists can be quite a tricky task. However, it is not an impossible task to complete and obtain a perfect finish. To achieve a desirable result, it is essential to prepare the surface beforehand by removing any dust or dirt on the joists.
And ceiling with a vacuum cleaner or a damp cloth to ensure adequate adhesion of paint over the area. You should also cover areas that you do not want to be painted.

Be sure to apply at least two coats of quality latex paint to the ceiling using either textured paint rollers or foam brushes for the best coverage. Afterward, let the painting dry for 24 hours before applying any sealants for more protection. With careful preparation and application of appropriate materials and tools, you can create a perfectly finished painted basement ceiling that will look as good as new!
Conclusion
You can achieve a professional look in your basement by painting the ceiling with exposed joists. By following these steps, you will be able to complete the job quickly and easily. You should carefully determine how to paint a basement ceiling with exposed joists.
Remember to take your time and prep the area properly for the best results. With a little effort, you can have a great-looking space that is perfect for entertaining or simply relaxing.