
Are you fed up with your cold, damp, and ugly concrete basement floor? Do you dread heading down to the lower levels of your home because its uncomfortable and dated design just isn’t inviting? If so, fear not—there is still hope! Laying lino on your cement basement floor can be a cost-effective way to create an inviting atmosphere as well as provide insulation for warmth.
This guide on how to lay lino on concrete basement floor will walk you through the materials needed, tools required, safety considerations and tips for successfully laying a lino—allowing you to transform your lackluster basement into a functional space that adds value to your home.
Needed Tools and Materials
Given below is a list of the tools and materials you will need in order to successfully lay lino on your basement floor.
- Vapor Barrier (6 Mil Plastic Sheeting)
- Tape Measure
- Lino of Your Choice
- Straight Edge
- Utility Knife/razor Blade
- Chalk Line
- Hot Glue Gun
- Seaming Tape
- Roller or heavy object to roll the lino into place for adhesion
12 Step-by-step Guides on How to Lay Lino on Concrete Basement Floor
Step 1: Prepare the Concrete Floor
To ensure that your lino will adhere to your concrete basement floor correctly, it is important to make sure it is properly cleaned and prepped beforehand. Start by sweeping away all dirt and debris from your concrete floor. Then, depending on the porousness of your concrete, you may need to treat it with a moisture sealant or primer before you can proceed any further.
Step 2: Measure and Cut Vapor Barrier
Once your concrete floor has been prepped correctly, measure out the area with measuring tape where you plan to lay the lino and cut your vapor barrier accordingly. Make sure that you leave approximately 3” of the vapor barrier exposed around all edges to ensure proper installation. Once your pieces are cut, lay them out on top of each other and use tape to secure them in place.
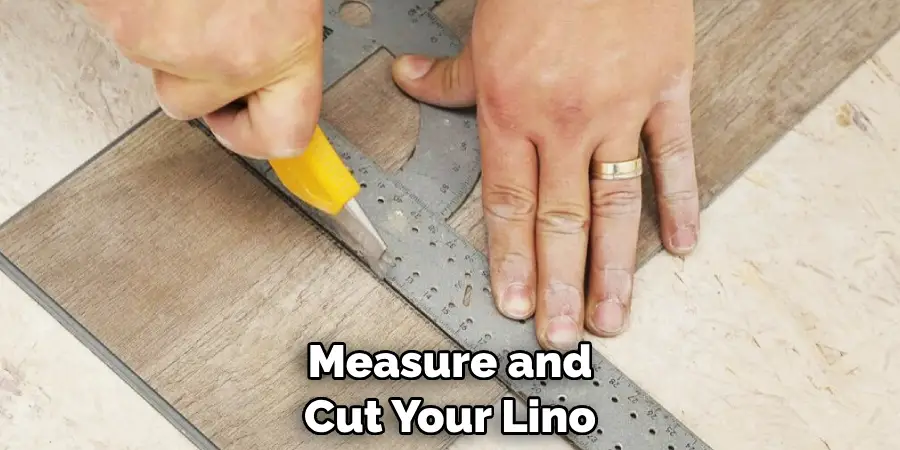
Step 3: Measure and Cut Lino
Now that the vapor barrier is installed, measure and cut your lino and lay it on top of the vapor barrier. Make sure that you leave a 3-4” space between the lino and wall to account for any potential expansion or contraction. Otherwise, your lino may buckle or come apart at the seams.
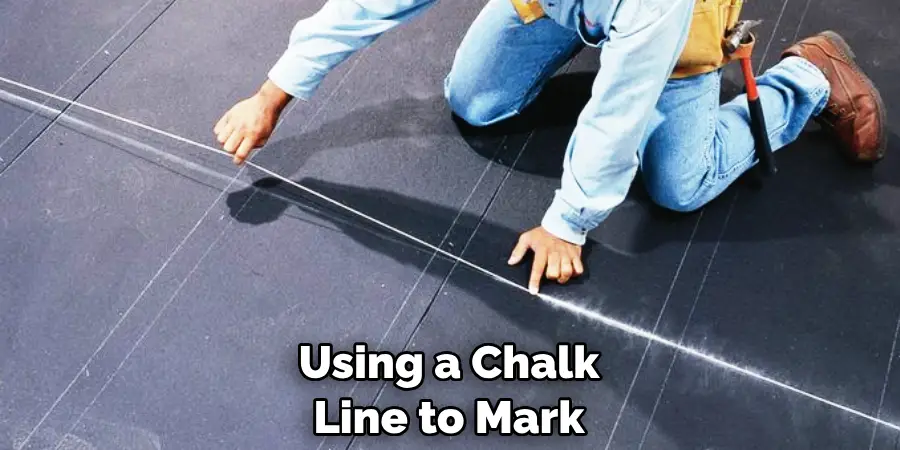
Step 4: Use Chalk Line to Mark Lino
Using a chalk line, mark the exact measurements for your lino before cutting. This will serve as a guide for when you are ready to cut the lino. It’s important to use a straight edge when cutting the lino with your razor blade or utility knife. This will ensure that you have nice, clean edges and create a professional-looking finish.
Step 5: Cut Lino
Once the chalk line has been drawn, use your utility knife or razor blade to cut along the marked lines. Make sure to be extra careful not to damage any of the edges as this may lead to an improper fit once it is installed. It’s also a good idea to test the fit of the pieces before continuing on with the installation. But don’t worry, if your cuts are off, you can always adjust them as needed before proceeding any further.
Step 6: Glue Lino
Once the lino has been cut to size, use a hot glue gun to apply glue along the perimeter of the lino. Make sure that you take your time with this step as it will determine how well the lino sticks once it is installed. It’s important to evenly distribute the glue along the edges and press down firmly as you go. This will ensure that the lino is secured in place and won’t come apart at the seams.
Step 7: Place Seaming Tape
After the glue has been applied, place seaming tape along the edges of the lino to ensure that the seams are sealed properly. It’s important to make sure that the tape is firmly pressed down along all edges and corners. This will provide an extra layer of protection and ensure that your lino won’t come apart at the seams.
Step 8: Place Lino on Vapor Barrier
Now it is time to place your cut and prepped lino on top of the vapor barrier that was previously installed. Make sure that you line up all of the edges and seams correctly before proceeding any further. Otherwise, your lino may not fit properly and you’ll have to start this process over again. This step is also a good time to inspect your lino for tears or other imperfections.

Step 9: Roll Lino
Once the lino has been placed, use a roller or heavy object to press down on it firmly in order to ensure that it sticks properly to the vapor barrier. This will also help fill in any gaps between the lino and floor which can help reduce the potential for moisture infiltration. But it is important to make sure that you don’t apply too much pressure as this could cause the lino to buckle or come apart at the seams.
Step 10: Let Lino Dry
Allow your lino to dry completely before walking on it or attempting to move any heavy objects over it. Depending on the type of glue you used, this may take a few hours or overnight. It’s important to be patient and let the lino dry completely before proceeding any further. This will ensure that the lino is properly adhered to the concrete floor before you move on to the next step.
Step 11: Trim Off Excess Vapor Barrier
Once the lino is dry, you can now trim off any excess vapor barrier that has been left around the edges of the lino. This will help to ensure that your lino fits snugly against the floor. It is important to be extra careful when using a utility knife or razor blade to avoid any potential damage to the lino.
Step 12: Enjoy Your New Lino!
Congratulations, you have successfully laid Lino on your concrete basement floor! Now it’s time to enjoy your newly transformed space. Not only is Lino a great way to makeover your basement, but it also adds insulation and warmth, making it the perfect choice for basements. Always remember to follow the manufacturer’s instructions for proper maintenance and cleaning of your Lino. Enjoy!
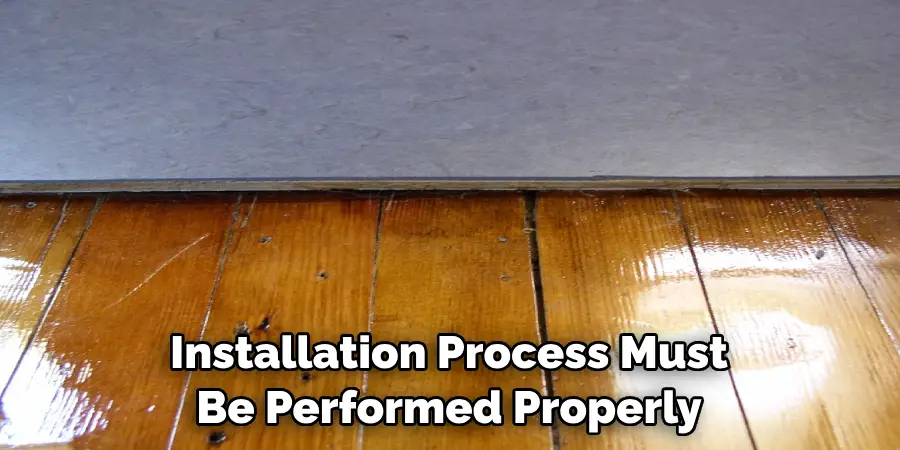
Above all else, remember that each step of the installation process must be performed properly in order for you to obtain maximum efficiency and durability from your lino. If you have any questions or concerns about your project, don’t be afraid to contact a professional for assistance.
Following these steps on how to lay lino on concrete basement floor correctly will ensure that your lino stays in place and looks great for years to come. All you have to do now is sit back and enjoy your beautifully transformed basement!
Frequently Asked Questions
Q: Can I Install Lino on a Concrete Floor Myself?
A: Yes, with the right tools and knowledge it is possible to successfully lay lino on your own. However, if you are unsure of the process or feel that you may need additional help, it is always best to contact a professional for assistance.
Q: How Long Does it Take to Install Lino?
A: The installation process can vary depending on the size and complexity of your project. Generally speaking, however, most lino installations should take between 1-2 days to complete.
Q: Are There Any Special Considerations When Installing Lino on a Concrete Basement Floor?
A: Yes, it is important to take extra precautions when installing a lino on a concrete basement floor. Make sure to prepare the floor correctly by cleaning and treating it if necessary. You should also pay special attention to any seams or edges that need to be sealed off in order to ensure that moisture does not seep into the lino. Finally, be sure to use a thick vapor barrier and heavy object to press the lino down into place for optimal adhesion.
Q: What Are Some Ways to Make Laying Lino Easier?
A: One of the best ways to make laying lino easier is by prepping your area correctly beforehand. Make sure to sweep away any dirt or debris, treat the surface with a moisture sealant or primer if necessary and measure out your area before cutting the lino.
Additionally, using a chalk line to mark your measurements and seaming tape for any seams can help to make sure that everything is lined up properly for installation. Finally, be sure to use a heavy object to roll the lino down into place once it has been glued.
Conclusion
All in all, laying lino on a concrete basement floor is a long-term yet straightforward project that any homeowner can complete with the right tools and materials. Not only will you save money by doing it yourself, but you’ll also get to enjoy the satisfaction of knowing the job was done right.
Furthermore, with the extra reinforcements suggested within this blog post, you’ll have peace of mind that your flooring will remain safe even during periods of stepping or heavy objects blunting its surface.
When it’s time to lay down lino for your basement flooring be sure to follow these tips and be patient through the whole process – and before you know it, you’ll have durable new flooring ready for nights spent around the bar playing Monopoly or whatever game your heart desires! Thanks for reading this article on how to lay lino on concrete basement floor.