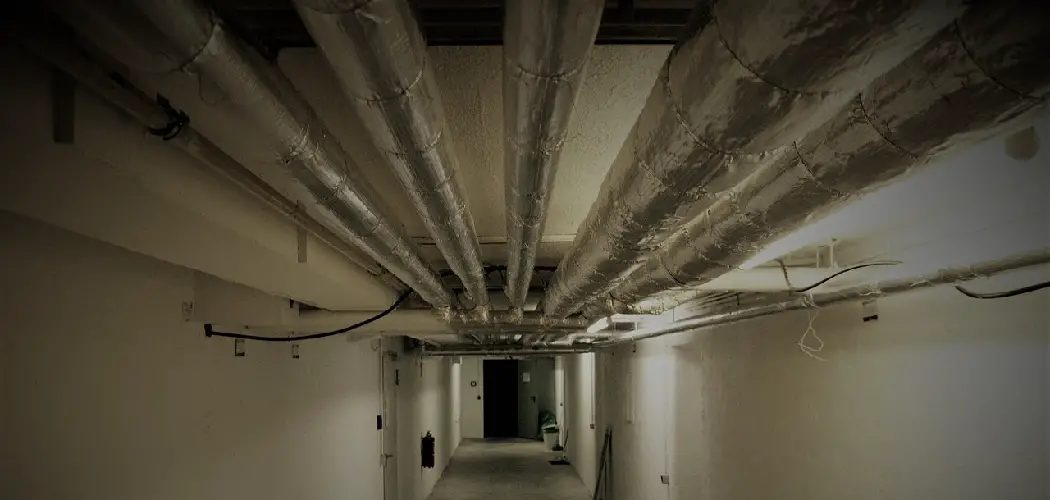
Do you have pipes in your basement ceiling that need to be covered? If so, this guide will show you how. It’s essential to safely and properly cover any exposed pipes as they can become a hazard for people walking underneath them or could cause damage if their insulation becomes damaged or wet.

Here, we’ll detail the step-by-step process needed to quickly and correctly install covers on your pipes while ensuring minimal aesthetic disruption from the finished product. With some basic tools, supplies, and these instructions on how to cover pipes in basement ceiling, you’ll soon have peace of mind that your basement is safer because of this important project.
Needed Materials
- Insulation Material (Fiberglass, Foam Board, Rock Wool)
- Sheetrock or Drywall Panels
- Wood Strips
- Nails and Screws
- Hammer and Screwdriver
- Caulking Gun and Weatherstripping
- Paint, if Desired
11 Step-by-step Instructions on How to Cover Pipes in Basement Ceiling
Step 1: Measure the Length and Width of Your Pipes
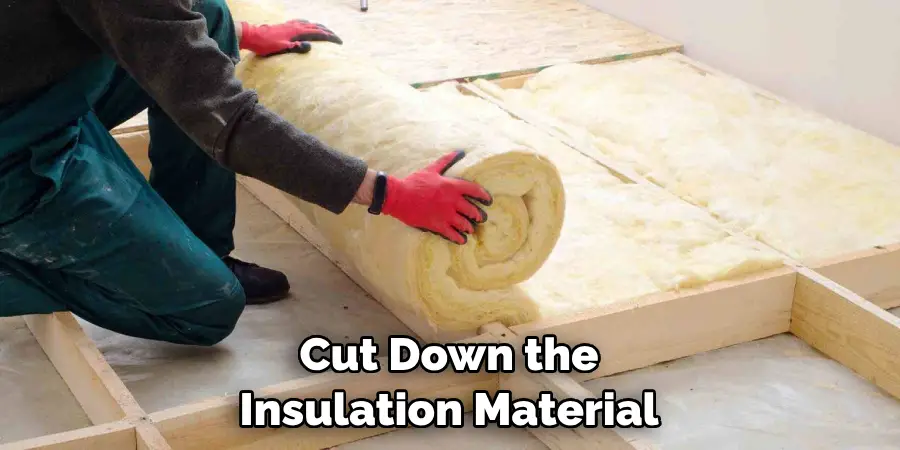
This is important to make sure you have enough materials for the job. If needed, cut down the insulation material to the appropriate length and width. But be sure to leave at least two inches of extra material on each end for overlap. This will help prevent any leaks from developing. It’s also important to ensure that the pipes are dry before you begin. It’ll be necessary to apply caulking and weatherstripping if the pipes are wet or damp.
Step 2: Cut the Insulation Material to Fit Your Pipes
Make sure it’s the right size and shape to fit snugly around your pipes. If you’re using fiberglass insulation, be sure to wear gloves and protective clothing when cutting it. But if you’re using foam board or rock wool insulation, gloves are not necessary. If you have any excess insulation, save it for future use. This material can be used to insulate hot or cold water pipes or any other type of pipe in your home.
Step 3: Cut the Wood Strips into Appropriate Sizes
Your strips should be about two inches wide, and you will need at least four of them per pipe. But you can always add more strips for extra support. It’s also important to make sure the wood strips are sturdy enough to hold up the insulation material and sheetrock or drywall panels in place. It might be wise to use a drill and screws instead of nails for extra support. This will ensure the strips won’t come loose as you’re installing your cover.
Step 4: Nail or Screw Your Insulation Material
Make sure that your insulation is held securely in place by your wood strips. If you’re using fiberglass insulation, it’s best to wear gloves when handling the material. Be sure to seal any gaps between the pipes and insulation with caulk or weatherstripping to prevent any cold air or moisture from entering your basement. But if you’re using foam board or rock wool, you don’t need to worry about sealing gaps.
Step 5: Measure and Cut Sheetrock
Be sure to get pieces that are slightly larger than the circumference of your pipes. If necessary, you can always use a saw or utility knife to cut them down to size. Most panels come with a paper backing that can easily be removed. it also helps to use a level to make sure your panels are properly aligned when you install them. But if your pipes are on an uneven surface, you might need to use shims or wedges to level them out.
Step 6: Secure Your Sheetrock
Make sure they are secured tightly to the wall. But it’s important to not over-tighten them as this could cause the panel to crack or split. Also, be sure to use a hammer and screwdriver to make sure the nails and screws are firmly in place. If you’re using screws, use one that is the correct size and length for your wall. It’s also wise to predrill the holes with a power drill before securing your sheetrock panels in place.
Step 7: Apply Weatherstripping
This will ensure an airtight seal around your pipes and keep them insulated. It also helps to prevent moisture from entering your basement. Make sure the weatherstripping is securely in place by using a caulk gun and a caulking compound. But if you’re using foam board, rock wool, or fiberglass insulation, you don’t need to use weatherstripping. It’s just an added layer of protection. It’s also important to note that if you have any exposed wires, they should be covered as well.

Step 8: Use Caulk
You want to make sure it is completely sealed off from any drafts. If you’re using sheetrock, use a caulking gun and a caulk that is designed for wood paneling. But if you’re using foam board or rock wool, a regular caulk should do the trick. This will help to keep your basement insulated and reduce energy costs. It is also a good time to paint your sheetrock if you want to. But be sure to prime it first. This will ensure a professional-looking finish.
Step 9: Check for Leaks
If you find any leaks, use caulk to seal them. Although it might seem tedious, checking for leaks is essential to ensure your basement ceiling is properly insulated. If you’re using fiberglass insulation, make sure it is securely in place and that there is no visible damage to it. This will help to ensure it is doing its job of keeping your basement warm. If you’re using foam board or rock wool, check for any gaps between the insulation and pipes. This will help to keep cold air from entering your basement.

Step 10: Paint Your Basement Ceiling if Desired
This step is optional, but it will help create a neat and clean look. This can be done with either a brush or paint roller. Be sure to use a primer before painting, as this will help the paint adhere better to the surface. It’s also important to select a paint that is designed for use on basement ceilings, as this will help protect it from any moisture or humidity. It is recommended to do this step before installing the sheetrock. Otherwise, you might have to repaint the sheetrock after it’s installed.
Step 11: Enjoy
Your basement is now safer and more aesthetically pleasing, thanks to this project! This is an easy and affordable way to make your home a little more comfortable. Plus, it will help keep your energy costs lower by keeping the cold air out. Enjoy your new and improved basement! If you need help with any step of the process, contact a professional who can provide guidance.
That’s it! You have now successfully learned how to cover pipes in the basement ceilings. Enjoy your new and improved basement!
Following these steps on how to cover pipes in basement ceiling should ensure that you can safely protect your pipes without sacrificing aesthetics. With just a few materials, tools, and some time, you’ll be able to quickly finish this job with minimal disruption. You’ll enjoy the peace of mind of knowing that your home is protected from any potential hazards or damages caused by exposed plumbing.
Do You Need to Hire a Professional Plumber?
If you have any concerns about the job or aren’t sure if it’s something you can handle yourself, hiring a professional plumber is always recommended. They will be able to safely and properly install your covers while ensuring minimal disruption.

How Much Will It Cost?
The cost of hiring a professional plumber will vary based on the scope of the job and any additional materials needed. The good news is that this project isn’t very expensive and should be within your budget.
Now that you know how to cover pipes in the basement ceiling, you can get started on safely and properly shielding them from any potential hazards. With just a few materials, tools, and these steps, you’ll have peace of mind knowing that your home is now safer and more aesthetically pleasing. Get ready to enjoy the finished look!
Conclusion
In conclusion on how to cover pipes in basement ceiling, covering pipes in your basement ceiling doesn’t have to be an intimidating project. With the right supplies and a little bit of time and patience, you can quickly turn that drab, cluttered space into one that looks neat and organized.
Taking the extra time to properly cover pipes in your basement will help keep them protected from any unseen water damage and improve the overall look of your basement. Furthermore, you’ll save money by tackling this project yourself instead of hiring a professional.
Not only is it a great weekend project but it also provides a sense of satisfaction when you see how it drastically changes the overall atmosphere of your basement area. So don’t wait any longer – take some time to cover those pesky pipes! You won’t regret it once you start reaping the benefits of having a tidy workspace with zero visible pipes.